At Home Cavitation Machine Before and After: My Experience
Feb 25,2025
Share
In today's fast-paced lifestyle, learning to easily and successfully pursue beauty needs can seem like a difficult task. Ultrasound cavitation is a much publicized non-invasive beauty treatment that uses the action of ultrasound waves of a very high frequency to break down fat cells and reshape the body silhouette.
Having a device at home to target unwanted areas of body fat deposits like love handles or stomach bulges is extremely desirable to me. I was quick to jump at the chance to discover if at-home cavitation was all that was hyped about.
In this blog, I will detail my personal experience with the treatment with the added bonus of stomach cavitation before and after photos, and I will also discuss the science of ultrasound technology.
Why I Used a Cavitation Machine at Home
My motivation to attempt to have a device at home was to treat areas of the body that were resistant to diet and exercise. With a lot of research that involved a lot of the Ultra Cavitat reviews and information posted by online communities, I was impressed with the potential of the devices.
Having the opportunity to work with the usage of the ultrasound at home without the need to have a medical practitioner present was very appealing to me. I was interested in devices that delivery high-frequency waves of ultrasound with variable intensity levels to provide personalized treatment to the various body types and areas of the body with excessive body fat accumulation. Now, we will talk about before and after lipo cavitation at home.
My Before Experience - Setting Expectations
Before starting the treatment of the cavitation, I also assessed the body shape. I had areas of body fat that were apparent that had accumulated on the stomach area, and love handles that I wanted to lose weight off of.
I had the following question at the beginning about the effectiveness of the device: "Will the device break down the fat cells or reduce fat?"
I was also concerned about side effects and safety due to the circumstance that I was treating the area at home without a medical recommendation. In the treatment prep work I had a pre-treatment program that involved being well-hydrated and that the skin was clean with no lotions applied to the area.
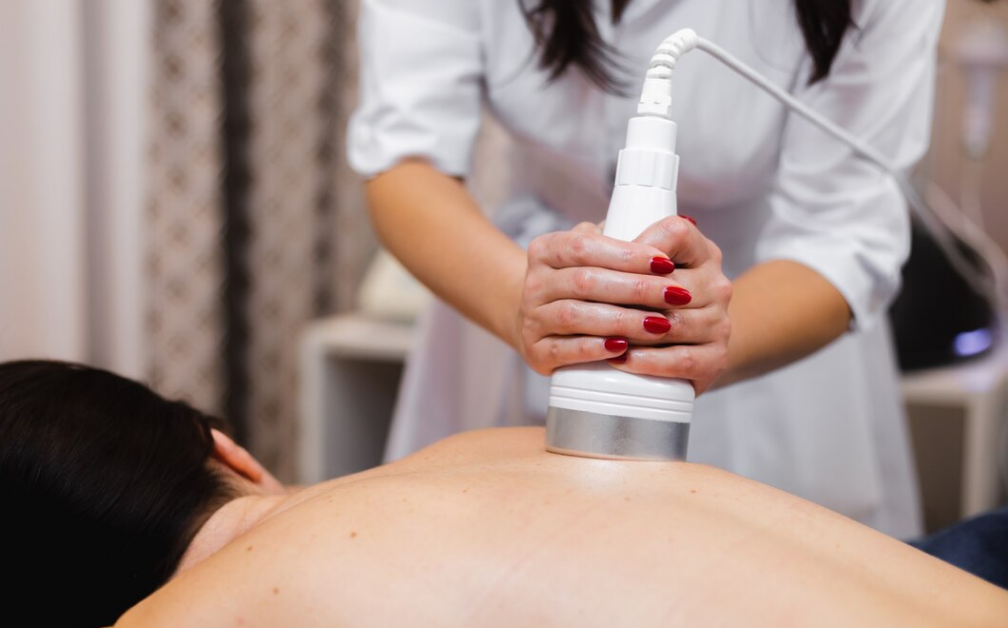
The Process - Using the At-Home Cavitation Machine
The first treatment was both overwhelming and exhilarating. I put a small amount of the ultrasound gel on the treatment area to allow the device to glide back and forth across the skin smoothly. I reduced the intensity to a comfortable level, feeling the waves of the ultrasound course into the skin with a warm, tingling sensation. Treatment sessions were 30 minutes per treatment area -- stomach area and love handles -- with me repeating the treatment twice a week per the manufacturer's instructions.
After the initial sessions, I could feel the effect taking effect. I could feel the skin hardening up while the areas of the fat were slightly lessened. I made a small change to the treatment by spreading the solution out while taking a little more time on the less responsive areas of the skin. I also drank plenty of fluids and followed healthy diets and exercises to support the treatment.
My After Results - Was It Really Worth It?
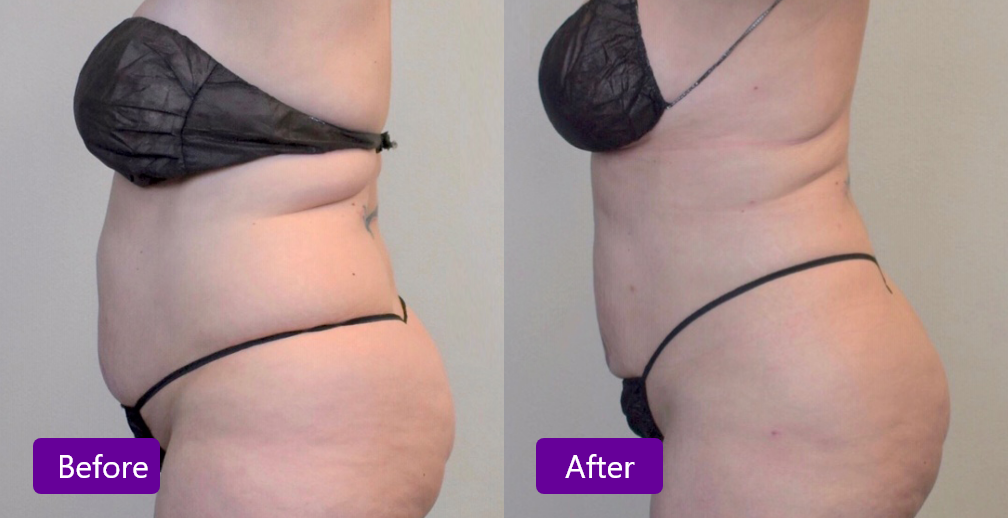
After several weeks of daily regular exercise, I was eagerly looking forward to witnessing the end results. Measuring the comparison of the before-and-after pictures yielded a noticeable stomach fat reduction with a toned appearance. Measurable results were a minor loss to my encouragement of mine. Cavitation with a healthy diet plan and exercise yielded smoother skin with a toned body overall. The added bonus of smoother skin texture with added confidence made the entire exercise worth the effort.
Here are my before and after pictures for your reference:
How Ultrasonic Cavitation Works
Understanding the science of ultrasonic cavitation treatments made me have greater respect for the treatment and realistic hopes for the outcome of the treatment. Ultrasound cavitation employs the usage of the low-frequency waves of the sound to target the body area treatment of the fat cells.
With the device being applied to the skin, the device sends strong waves of ultrasound deep into the skin layers. The pressure vibration of the waves of the sound within the fat cells shatter them and spill their contents out of the broken-down, shattered fat cells.
The broken-down shattered fat cells have the removed contents broken down into the elements of the components of the glycerol and the free fatty acids that are then drawn into the body's lymphatic system to the liver to break them down by the body to have them expelled by the body.
Pros & Cons of At-Home Cavitation Machines
Benefits of At-home Cavitation:
Non-Invasive: This is one of the biggest benefits of ultrasonic cavitation. Although it does not involve incisions or anesthesia, unlike surgical procedures, it is a safer and more accessible option for many.
Targeted Fat Loss (targeted areas for removing fat): It targets specific areas of the body with resistant body stores of fat, which is very hard to lose with a diet and exercise.
Skin Tightening: Collagen production from ultrasound cavitation can also smooth and tone skin texture.
No Downtime: There is no loss of time with the treatment, and after the treatment, the patient can continue their daily work immediately.
No Pain: The treatment is typically painless & it gives a warm feeling, which is experienced by a few patients.
Convenience: You can use the device anytime and don’t have to schedule visits
Affordable: Home treatment sessions cost far less than those that are provided by a professional.
Privacy: It’s your home, it can be as private as you would like it to be.
Cons of Cavitation at Home:
Limited Effectiveness: Effects are less noticeable with respect to a treatment by a professional.
Slower Results: Needs to be applied again and again within weeks or a couple of months to find noticeable results.
Learning Curve: The technique is very crucial to achieve optimal results with misuse bringing about inconsistent results.
Potential Risks: It can produce mild side effects of burn, inflammation, or reddening if applied incorrectly.
Quality Concerns: Substandard devices are also not properly functional and raise concerns regarding their safety.
Choosing the Ideal At-Home Cavitation Machine
When selecting a device to use at home, various considerations have to be made to deliver effectiveness and safety. Ensure that the device is of a high frequency (around 40 kHz) with variable intensity levels. It will then easily break down the fat cells by easily penetrating the skin. Consider the shape and the dimensions of the device since devices are sold with differently shaped and dimensioned applicators to target specific body areas like the arms, stomach, and thighs. Safety measures like temperature sensors and turnoff upon failure are also a must to avoid burn injuries. Online reviews and ratings by other individuals can also serve to inform about the effectiveness of the device and ease of usage.
Tips for the Best Outcome
To maximize the effectiveness of your at-home cavitation machine, consider the following tips:
Stay Hydrated: Drink a lot of water both before and after every workout to support the flushing out of broken-down fat cells.
Follow a Healthy Diet Regimen: Avoid excessive calorie intake and sweetened foods that will compromise the treatment.
Exercise Regularly: Incorporate cardiovascular exercise and strength training to aid weight loss and overall well-being.
Be Consistent: Stay with the recommended treatment regimen and allow the body time to adapt.
Monitor Progress: Track regular measurements and photos to monitor the progress you are making and change your regimen accordingly
My Awareness and Personal Experience
From the beginning of the cavitation treatment at home to the final treatment, I learned a lot about the treatment itself and the results I could expect to gain. I learned that the key to getting the best body contouring results was incorporating cavitation into a healthy lifestyle. Drinking fluids, a healthy diet, and exercise all benefited the treatment itself as well as me overall. I also learned that consistency was the key to results. Following the instructions with the device and giving time to allow the body to adapt was the way to observe subtle but noticeable results.
FAQs About At-Home Cavitation
Is at-home cavitation the same as a salon treatment?
While professional treatment will deliver more intense devices and bespoke treatment, at-home cavitation can also deliver noticeable results with regular usage if proper technique is followed.
Does ultrasonic cavitation have any risks?
Ultrasonic cavitation devices are usually safe if applied correctly. Side effects are possible and can include mild bruising, skin reddening, or swelling that will subside within a couple of days.
How often do you operate a cavitation machine at home?
Most at-home devices will instruct you to use the device a couple of times a week for a few weeks to observe the best results.
Is 10 minutes of cavitation adequate?
The duration of the sessions will also change according to the device and the treatment area. Usually, sessions range between 20 to 30 minutes to produce optimal results.
How long will I feel the effect of cavitation?
Results can materialize within a couple of sessions, although noticeable results are usually obtained within a couple of weeks of continuous usage.